# CozIR-LP2
## 1.특징
* 최첨단 Solid-State LED 광학 기술 이용한 초 저전력 NDIR CO2 센서
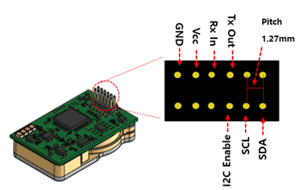
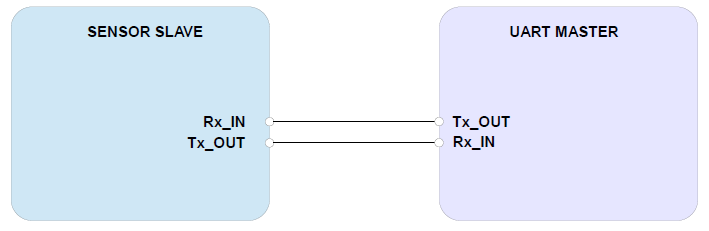
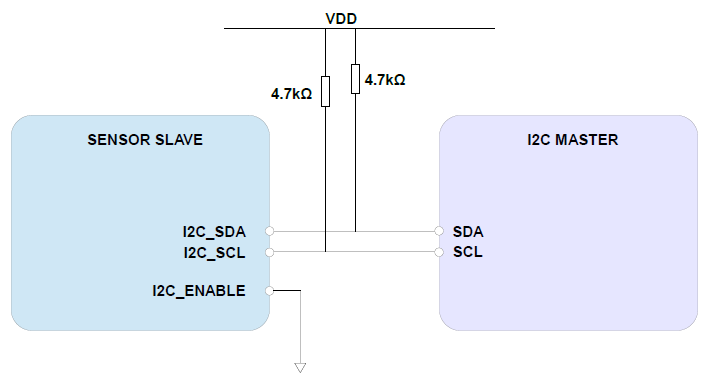
* 디지털(UART) 및 I2C 출력
* 높은 CO2 측정 정확도 유지하면서 전력 소비 줄일 수 있음
* 내장형 자동 영점 조정
* 30 ppm(일반) 정확도
## 2.애플리케이션
* 난방, 환기 및 공기 조절(HVAC)
* 건물 관리 시스템(BMS)
* 환기 조절 시스템(DCV)
* 차량 내 공기 질
* 무선 장비를 이용한 IoT 및 Smart Technology
* 실내 공기 질(IAQ)
* 계측
* 농업
* 항공우주
## 3.사양

| 항목 | 내용 |
| ---------- | ---------------------------------------------------------------------------------------------- |
| 측정 범위 |
{% endtab %}
{% endtabs %}
## 6.통신 환경 및 명령어
* 통신 환경
| PARAMETER | TYP | UNIT |
| :-------------------: | :--: | :----: |
| Buad Rate | 9600 | Bits/s |
| Data Bits | 8 | |
| Parity | None | |
| Stop Bits | 1 | |
| Hardware Flow Control | None | |
* 통신 명령어
| Command | Description | Response |
| ------------------------- | -------------------------------------------- | -------------------------------------------- |
| K 0 | Command를 기다리는 상태, 측정 X | K 00000 |
| K 1 | 연속적으로 값을 측정 | K 00001 |
| K 2 | 센서 값 요청시에만 응답 | K 00002 |
| Z | 가장 최근에 측정한 CO2 필터 된 값 | Z 00521 |
| z | 가장 최근에 측정한 CO2 필터 되지 않은 값 | z 00521 |
| A ### | CO2 필터 값 설정 | A 00016 |
| a | CO2 필터 값 확인 | a 00016 |
| U | 질소를 사용하여 제로 교정 | U 33000 |
| u | 초기 설정 값으로 제로 교정 | u |
| G | Fresh Air를 사용하여 제로 교정 | G 33000 |
| X ##### | 현재 값으로 스팬 교정 | X 11000 |
|
P 10### P 11###
| Fresh Air에서 사용할 대기 중 농도를 설정 (default 400ppm) | Fresh Air에서 사용할 대기 중 농도를 설정 (default 400ppm) |
| S ### | 고도 설정 | S 08192 |
| s | 고도 설정 값 확인 | s 08192 |
| M ### | 측정 데이터 문자열로 전송 | M 6 |
## 7.모드 설정 및 CO2 값 읽기
* COMMAND 모드: COMMAND를 기다리는 상태, 측정 X
* Streaming 모드(default): 연속적으로 값을 측정함(초당 2회 측정), 측정 외 다른 Command시 100ms delay가 필요함
* Polling 모드: 센서 값 요청 시에만 응답, 센서 값 요청하지 않을 때에는 백그라운드에서 계속 측정을 수행함
| Mode | Command | Description | Response |
| --------- | ------- | -------------- | -------- |
| Command | K 0 | 명령어 기다리는 상태 | K 00000 |
| Streaming | K 1 | 연속적으로 값 측정 | K 00001 |
| Polling | K 2 | 센서 값 요청 시에만 응답 | K 00002 |
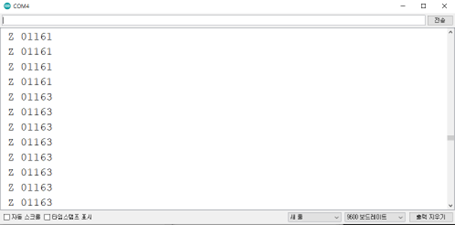
### Streaming mode에서 CO2 값 읽기
```cpp
#include
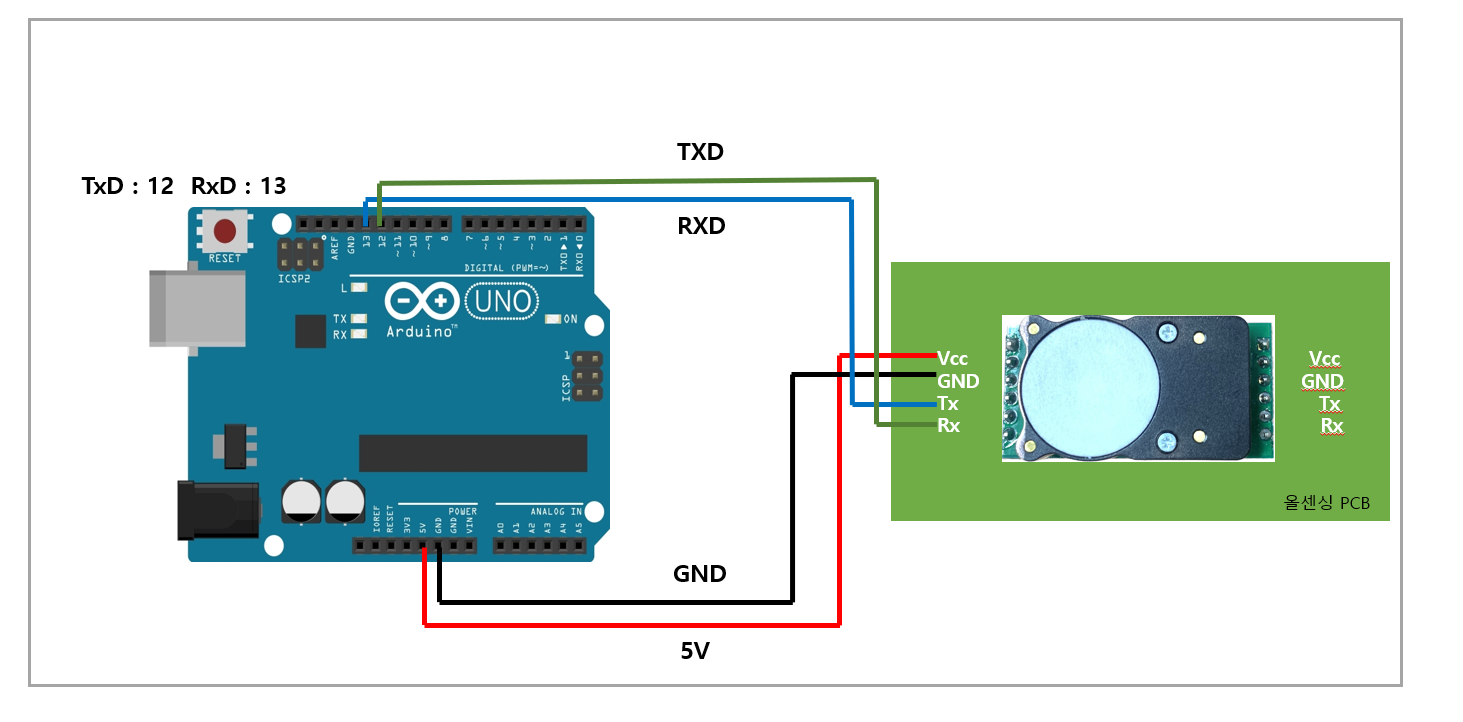
SoftwareSerial mySerial(12, 13); //Uno Rx Tx (12 13) = SoftwareSerial
const char* Polling_mode = "K 2\r\n";
const char* Stream_mode = "K 1\r\n";
const char* Standby_mode = "K 0\r\n";
bool tx_ready;
bool rx_ready;
String str;
void setup() {
Serial.begin(9600); //시리얼 통신 초기화
mySerial.begin(9600);
while(!mySerial){} //시리얼 통신 포트가 연결되기 전까지 대기
delay(14); // power on data ready
mySerial.print(Stream_mode); //Polling 모드로 변경
mySerial.print("Z\r\n"); //CO2값 읽기 명령
}
void loop()
{
if(rx_ready == 0) // overflow 처리
{
delay(31); // Measurement data ready
if(mySerial.available()>0) //수신받은 데이터가 0 초과, 즉 데이터가 존재한다면
{ //버퍼에서 읽어드린 char의 데이터를 String 형태로 반환
str = "";
str = mySerial.readStringUntil('\n');
Serial.println(str);
rx_ready = 1;
tx_ready = 1;
}
}
else if(tx_ready == 1)
{
mySerial.print("Z\r\n"); //CO2값 읽기 명령
tx_ready = 0;
rx_ready = 0;
}
}
```
### Polling mode에서 CO2값 읽기
```cpp
#include
SoftwareSerial mySerial(12, 13); //Uno Rx Tx (12 13) = SoftwareSerial
const char* Polling_mode = "K 2\r\n";
const char* Stream_mode = "K 1\r\n";
const char* Standby_mode = "K 0\r\n";
String str;
void setup() {
Serial.begin(9600); //시리얼 통신 초기화
mySerial.begin(9600);
while(!mySerial){} //시리얼 통신 포트가 연결되기 전까지 대기
delay(14); // power on data ready
mySerial.print(Polling_mode); //Polling 모드로 변경
}
void loop()
{
if(Serial.read() == 'R')
{
mySerial.print("Z\r\n"); //CO2값 읽기 명령
}
if(mySerial.available()>0) //수신받은 데이터가 0 초과, 즉 데이터가 존재한다면
{ //버퍼에서 읽어드린 char의 데이터를 String 형태로 반환
str = "";
str = mySerial.readStringUntil('\n');
Serial.println(str);
}
}
```
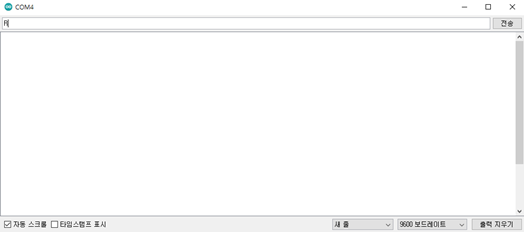
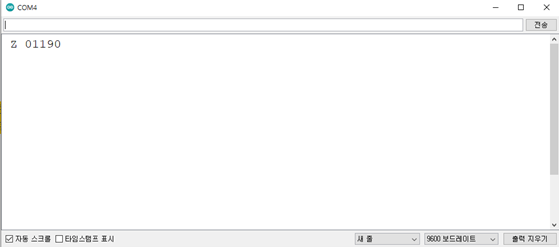
* 시리얼 모니터에 'R' 입력 후 엔터
* 응답
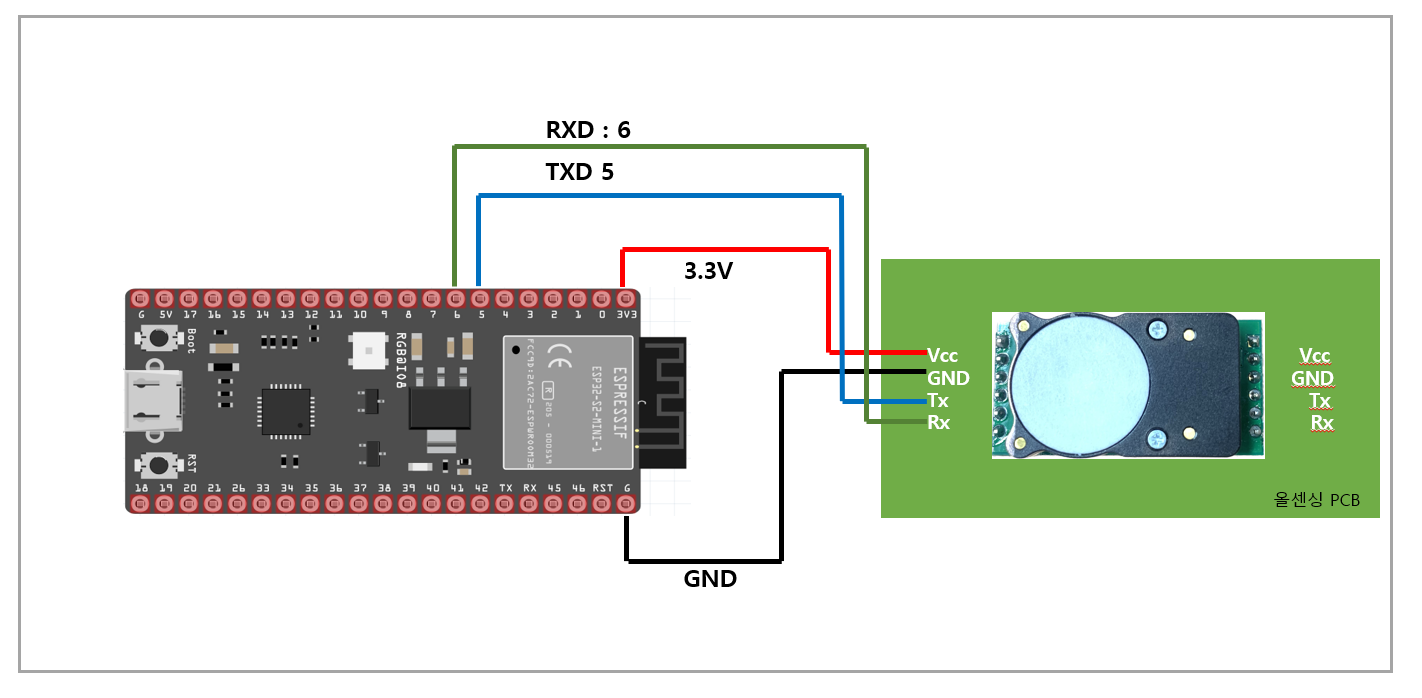
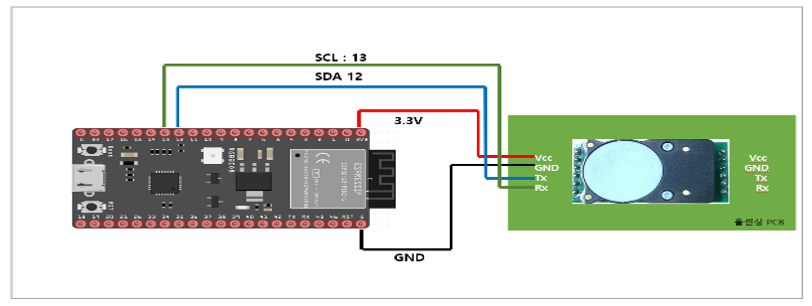
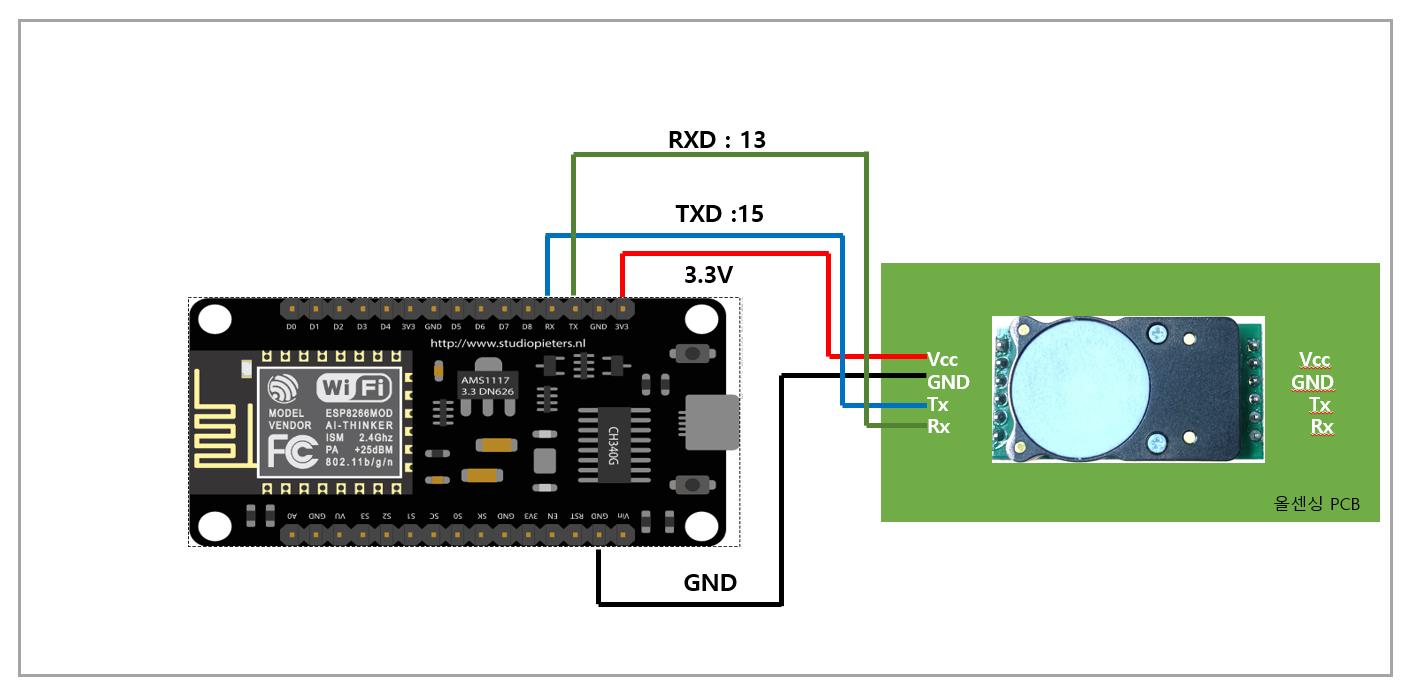
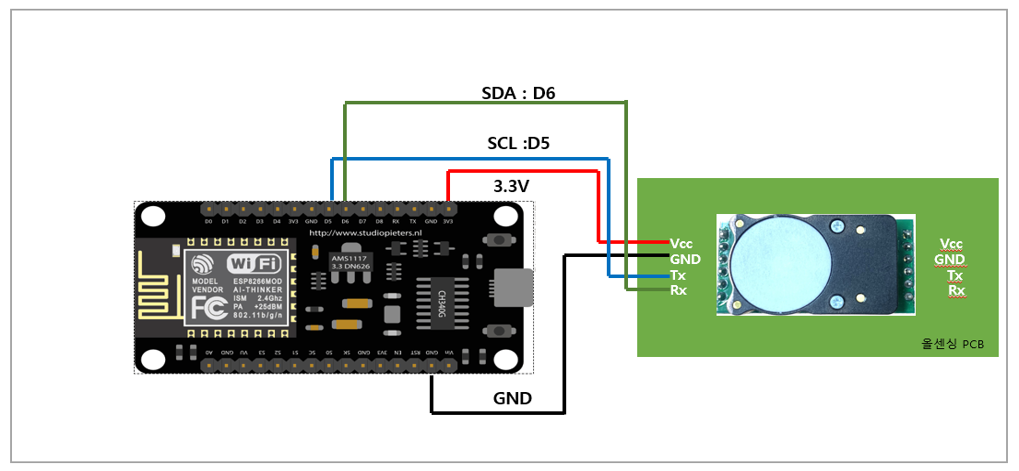
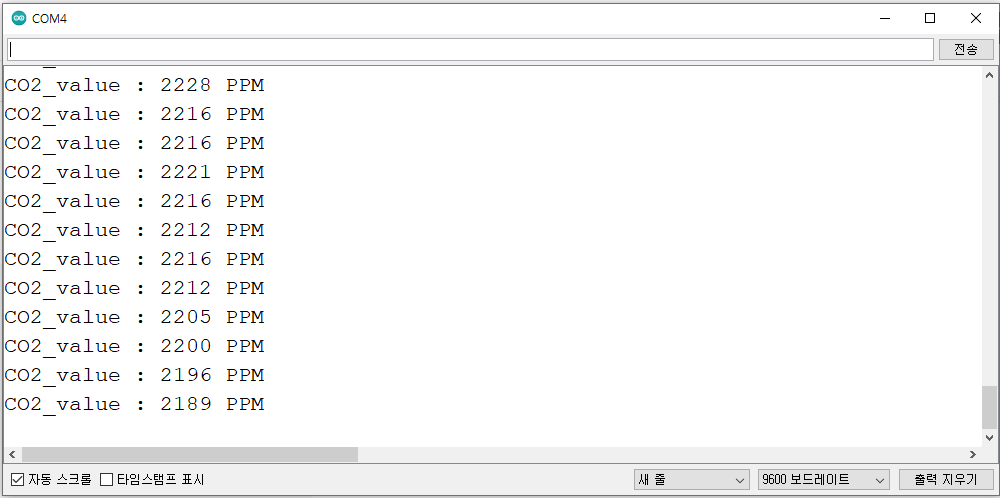
## 8.UART,I2C CO2값 읽기
### I2C
```cpp
#include
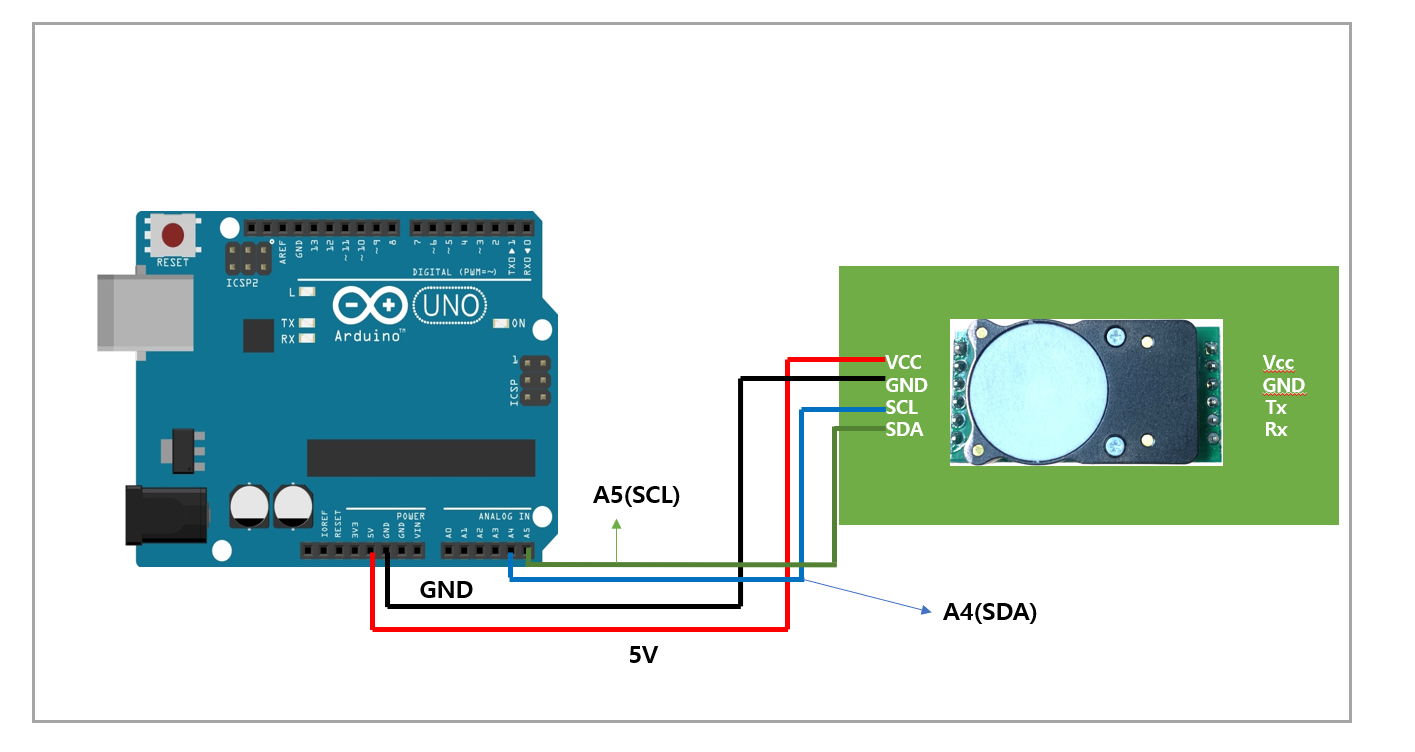
#define Slave_adddress 0x41
#define CO2_READ_command 0x34
#define CO2_READ_and_test_command 0x02
void setup() {
Wire.begin();
Serial.begin(9600);
}
void loop() {
int CO2_value = 0;
Wire.beginTransmission(Slave_adddress); // transmit to slave address
Wire.write(CO2_READ_and_test_command); // transmit to register address
Wire.endTransmission(); // stop transmitting
Wire.requestFrom(Slave_adddress, 3); //from slave request 2byte
while ( Wire.available()) {
int CO2_high_value = Wire.read();
int CO2_low_value = Wire.read();
/* CO2_Self_test value = 85(DEC) : Sensor is nominal ,
CO2_Self_test value = 170(DEC): Sensor error */
int CO2_self_test = Wire.read();
CO2_high_value = CO2_high_value <<8;
CO2_value = CO2_high_value + CO2_low_value;
Serial.print("CO2_value : ");
Serial.print(CO2_value); //reading CO2 value
Serial.println(" PPM ");
}
delay(1000);
}
```
### UART
```cpp
#include
SoftwareSerial mySerial(12, 13); //Uno Rx Tx (12 13) = SoftwareSerial
const char* Polling_mode = "K 2\r\n";
const char* Stream_mode = "K 1\r\n";
const char* Standby_mode = "K 0\r\n";
bool tx_ready;
bool rx_ready;
String str;
void setup() {
Serial.begin(9600); //시리얼 통신 초기화
mySerial.begin(9600);
while(!mySerial){} //시리얼 통신 포트가 연결되기 전까지 대기
delay(14); // power on data ready
mySerial.print(Stream_mode); //Polling 모드로 변경
mySerial.print("Z\r\n"); //CO2값 읽기 명령
}
void loop()
{
if(rx_ready == 0) // overflow 처리
{
delay(31); // Measurement data ready
if(mySerial.available()>0) //수신받은 데이터가 0 초과, 즉 데이터가 존재한다면
{ //버퍼에서 읽어드린 char의 데이터를 String 형태로 반환
str = "";
str = mySerial.readStringUntil('\n');
Serial.println(str);
rx_ready = 1;
tx_ready = 1;
}
}
else if(tx_ready == 1)
{
mySerial.print("Z\r\n"); //CO2값 읽기 명령
tx_ready = 0;
rx_ready = 0;
}
}
```
* I2C
* UART
## 9.Digital filter
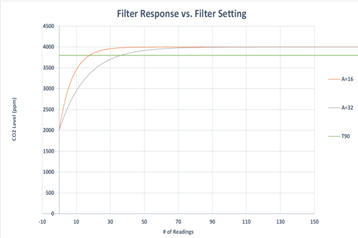
* 필터(Filtered)된 값과 필터 되지 않은(Unfiltered) CO2 값의 차이는 아래 그림과 같음
* 필터된(Filtered) CO2 값은 노이즈를 제거하여 더 정확한 값을 제공함
### Digital filter 설정
* 필터 설정 범위: 1\~255( 1= Unfiltered)
* 필터의 설정 값이 증가하면 측정 출력 응답 시간이 늘어남
* A=필터 설정 값
* A = 32 가 A = 16(default) 보다 T90에 도달하는 시간이 늘어남
### Digital filter Command
| Command | Description | Example | Response |
| ------- | ----------- | ------- | -------- |
| A ### | CO2 필터 값 설정 | A 16 | A 00016 |
| a | CO2 필터 값 확인 | a | a 00016 |
### 예제코드
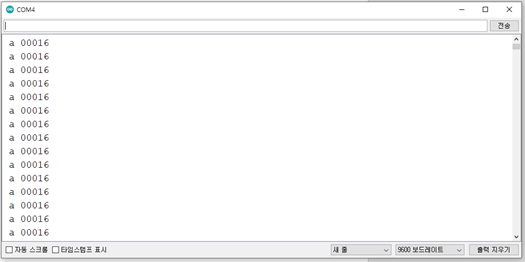
* CO2 필터 값 확인
```cpp
#include
SoftwareSerial mySerial(12, 13); //Uno Rx Tx (12 13) = SoftwareSerial
const char* Polling_mode = "K 2\r\n";
const char* Stream_mode = "K 1\r\n";
const char* Standby_mode = "K 0\r\n";
bool tx_ready;
bool rx_ready;
String str;
void setup() {
Serial.begin(9600); //시리얼 통신 초기화
mySerial.begin(9600);
while(!mySerial){} //시리얼 통신 포트가 연결되기 전까지 대기
delay(14); // power on data ready
mySerial.print(Stream_mode); //Polling 모드로 변경
}
void loop()
{
if(rx_ready == 0) // overflow 처리
{
delay(31); // Measurement data ready
if(mySerial.available()>0) //수신받은 데이터가 0 초과, 즉 데이터가 존재한다면
{ //버퍼에서 읽어드린 char의 데이터를 String 형태로 반환
str = "";
str = mySerial.readStringUntil('\n');
Serial.println(str);
rx_ready = 1;
tx_ready = 1;
}
}
else if(tx_ready == 1)
{
mySerial.print("a\r\n"); //현재 설정된 필터 값 읽기 명령어
tx_ready = 0;
rx_ready = 0;
}
}
```
* 시리얼 모니터
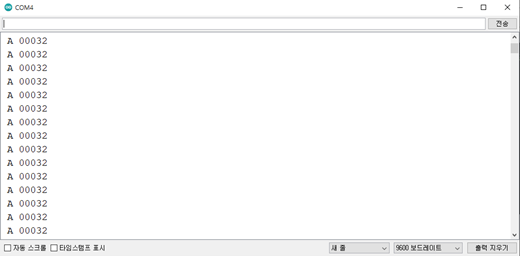
* CO2 필터 값 설정
```cpp
#include
SoftwareSerial mySerial(12, 13); //Uno Rx Tx (12 13) = SoftwareSerial
const char* Polling_mode = "K 2\r\n";
const char* Stream_mode = "K 1\r\n";
const char* Standby_mode = "K 0\r\n";
bool tx_ready;
bool rx_ready;
String str;
void setup() {
Serial.begin(9600); //시리얼 통신 초기화
mySerial.begin(9600);
while(!mySerial){} //시리얼 통신 포트가 연결되기 전까지 대기
delay(14); // power on data ready
mySerial.print(Stream_mode); //Polling 모드로 변경
}
void loop()
{
if(rx_ready == 0) // overflow 처리
{
delay(31); // Measurement data ready
if(mySerial.available()>0) //수신받은 데이터가 0 초과, 즉 데이터가 존재한다면
{ //버퍼에서 읽어드린 char의 데이터를 String 형태로 반환
str = "";
str = mySerial.readStringUntil('\n');
Serial.println(str);
rx_ready = 1;
tx_ready = 1;
}
}
else if(tx_ready == 1)
{
mySerial.print("A 32\r\n"); //필터 값 변경 명령어
tx_ready = 0;
rx_ready = 0;
}
}
```
* 시리얼 모니터